【TiDB 使用环境】生产环境
【TiDB 版本】8.5.2
【操作系统】银河麒麟高级服务器v10 sp3
【部署方式】机器部署(海光cpu、sas硬盘)
【集群数据量】
【集群节点数】
【问题复现路径】做过哪些操作出现的问题
【遇到的问题:问题现象及影响】
【资源配置】进入到 TiDB Dashboard -集群信息 (Cluster Info) -主机(Hosts) 截图此页面
【复制黏贴 ERROR 报错的日志】
【其他附件:截图/日志/监控】
可以看看这个文档,挺详细的,有手就行~
使用 TiUP 部署 TiDB 集群 | TiDB 文档中心
如果部署遇到问题,直接发帖问就行了
1 个赞
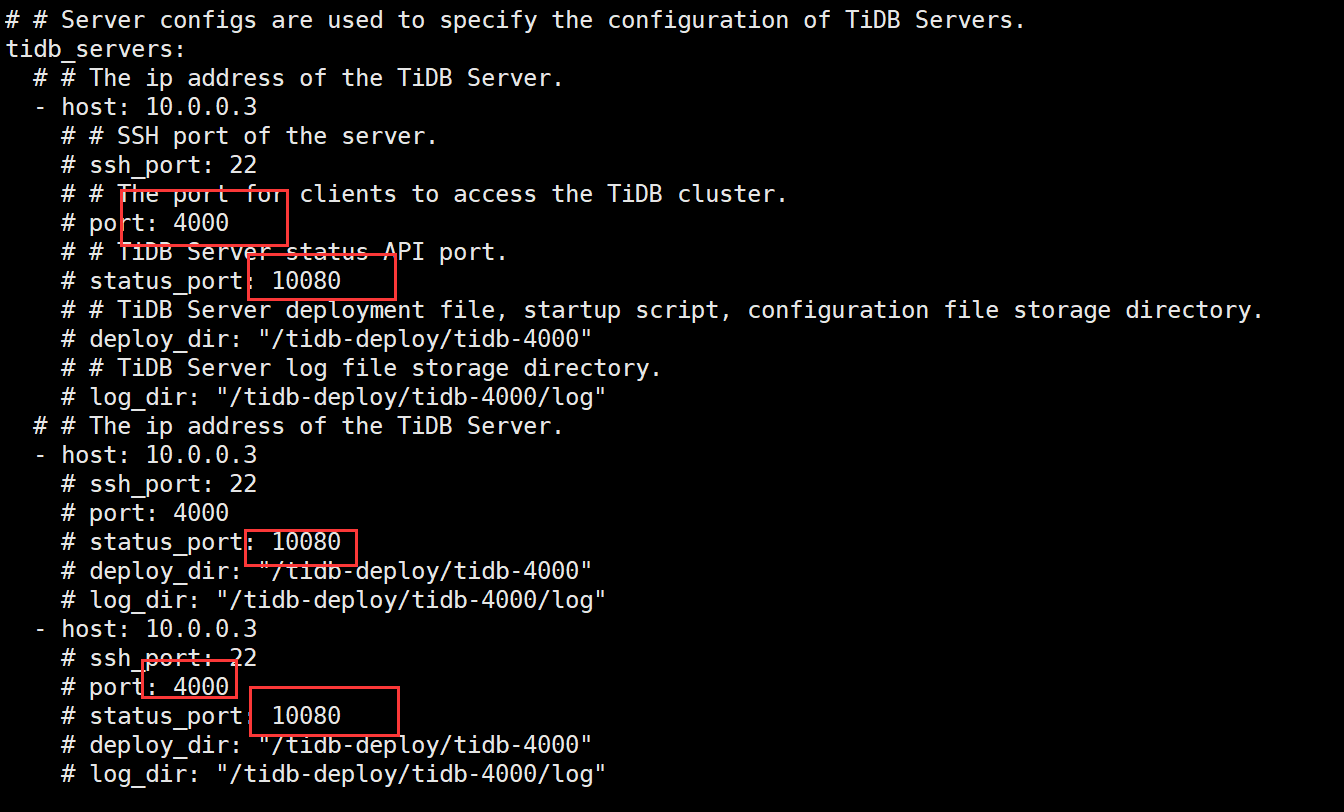
执行vi topology.yaml,出现下面内容
# The user who runs the tidb cluster.
user: “tidb”
# group is used to specify the group name the user belong to if it’s not the same as user.
group: “tidb”
# systemd_mode is used to select whether to use sudo permissions. When its value is set to user, there is no need to add global.user to sudoers. The default value is system.
systemd_mode: “system”
# SSH port of servers in the managed cluster.
ssh_port: 22
# Storage directory for cluster deployment files, startup scripts, and configuration files.
deploy_dir: “/tidb-deploy”
# TiDB Cluster data storage directory
data_dir: “/tidb-data”
# default listen_host for all components
listen_host: 0.0.0.0
# Supported values: “amd64”, “arm64” (default: “amd64”)
arch: “amd64”
# Resource Control is used to limit the resource of an instance.
# See: https://www.freedesktop.org/software/systemd/man/systemd.resource-control.html
# Supports using instance-level resource_control to override global resource_control.
resource_control:
# See: https://www.freedesktop.org/software/systemd/man/systemd.resource-control.html#MemoryLimit=bytes
memory_limit: “2G”
# See: https://www.freedesktop.org/software/systemd/man/systemd.resource-control.html#CPUQuota=
# The percentage specifies how much CPU time the unit shall get at maximum, relative to the total CPU time available on one CPU. Use values > 100% for allotting CPU time on more than one CPU.
# Example: CPUQuota=200% ensures that the executed processes will never get more than two CPU time.
cpu_quota: “200%”
# See: https://www.freedesktop.org/software/systemd/man/systemd.resource-control.html#IOReadBandwidthMax=device%20bytes
io_read_bandwidth_max: “/dev/disk/by-path/pci-0000:00:1f.2-scsi-0:0:0:0 100M”
io_write_bandwidth_max: “/dev/disk/by-path/pci-0000:00:1f.2-scsi-0:0:0:0 100M”
# Monitored variables are applied to all the machines.
monitored:
# The communication port for reporting system information of each node in the TiDB cluster.
node_exporter_port: 9100
# Blackbox_exporter communication port, used for TiDB cluster port monitoring.
blackbox_exporter_port: 9115
# Storage directory for deployment files, startup scripts, and configuration files of monitoring components.
deploy_dir: “/tidb-deploy/monitored-9100”
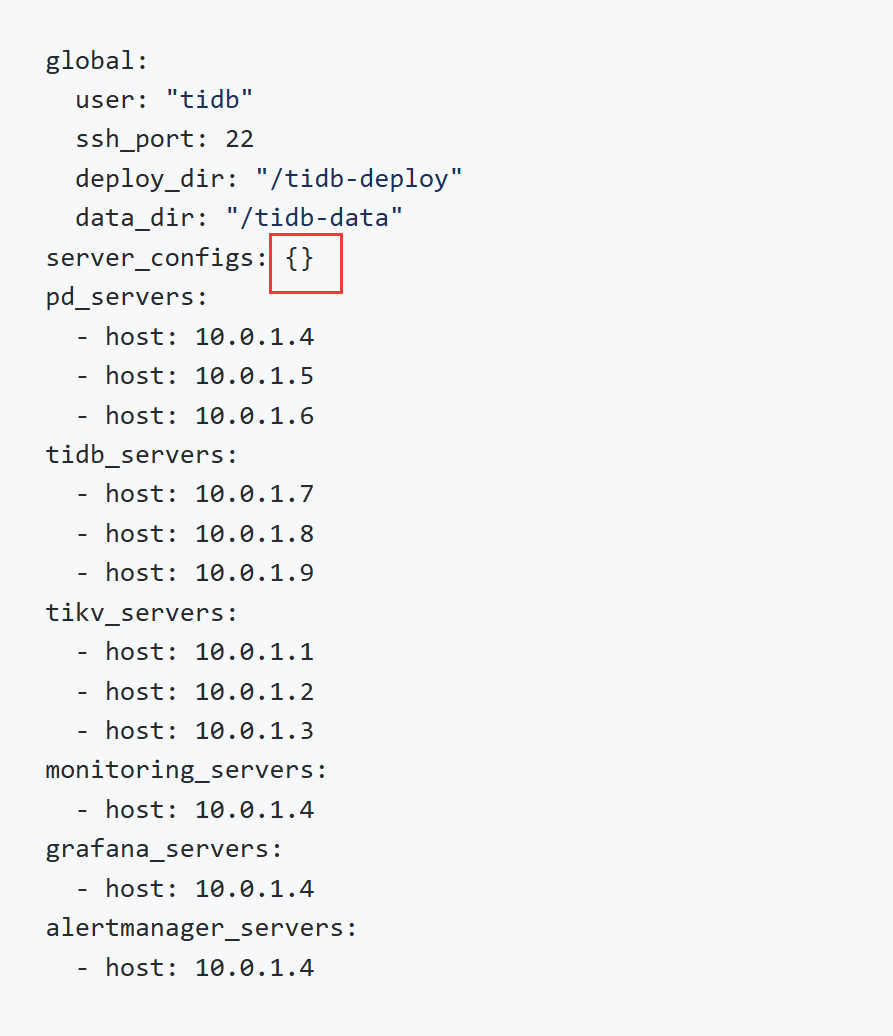
上面内容和官网安装说明里面的内容不一样,这个要怎么修改,下面是官网安装说明的内容
global:
user: “tidb”
ssh_port: 22
deploy_dir: “/tidb-deploy”
data_dir: “/tidb-data”
server_configs: {}
pd_servers:
- host: 10.0.1.4
- host: 10.0.1.5
- host: 10.0.1.6
tidb_servers: - host: 10.0.1.7
- host: 10.0.1.8
- host: 10.0.1.9
tikv_servers: - host: 10.0.1.1
- host: 10.0.1.2
- host: 10.0.1.3
monitoring_servers: - host: 10.0.1.4
grafana_servers: - host: 10.0.1.4
alertmanager_servers: - host: 10.0.1.4
pd,tidb,tikv这些你都配一个host就可以其他的删掉或者注释掉
好的,我先试试,谢谢
注释掉就是使用默认的
1 个赞
这里是写服务的配置文件的,可以先不写,有需要后面可以再改
1 个赞
Tidb 安装很简单便捷,按照官方文档来就行了,官网文档就是最好的文档
1 个赞
不需要填写。
这是我本地虚拟机用的,单节点,副本数1,日志只保留3天
topology.txt (604 字节)
1 个赞
谢谢,兄弟
好的,感谢兄弟
好的,我再尝试看能不能安装成功,感谢兄弟
单机用–user root -p装,会简单不少,不用先创建tidb用户,会自动添加
1 个赞
![]()
![]()
![]()
如何本地备份呢
tiup单机安装很简单呀。官方手册有写。
看官方手册就可以
一个节点跑起来很吃力感觉